An ethereal dessert fit for the Moon Goddess and Moon Rabbit on Mid Autumn Festival! These are not exactly mooncakes but they are in the exact shape of mooncakes but much easier to make, contain a lot more protein and much less sugar or carbs, and filled with a homemade seasonal pumpkin filling.
Mung bean cakes are so underrated and lesser known - it's like a well-kept secret but I believe these creamy, delicate, super healthy, and not-too-sweet treats deserve to be enjoyed by more! The main ingredient is steamed shelled mung beans, and technically you only need ONE other ingredient, which is some form of fat, you can use butter, coconut oil, or even vegetable oil.
I do recommend using an oil that becomes solid at room temperature for a better texture and appearance. Sweetener is totally optional, and I actually really enjoy unsweetened plain mung bean cakes.
Since it's only two days from this year's Mid Autumn Festival, I pressed them in mooncake molds with a moon palace and moon rabbit pattern! You can use any mold you have, or even press the mung bean mixture in a flat bottom dish and then cut it into smaller squares. For fillings, I made a creamy pumpkin paste, you can also use sweetened red bean paste, sesame paste, or peanut paste etc.
And just to clarify, these are not traditional moon cakes! Traditional moon cakes are made of either baked pastry or snow skin, aka mochi skin. But as a lazy chef I opted for this much easier mung bean cake version - AND you get tons of protein with your dessert, win win ;)
INGREDIENTS:
250 g shelled mung beans
60 g coconut oil or vegan butter
2 tablespoon condensed coconut milk, or other sweetener of choice
1 teaspoon rose powder, for color, optional
1 teaspoon butterfly pea flower powder, for color, optional
For the Pumpkin Filling -
1 15 oz can pumpkin puree
1/4 cup brown sugar
2 tablespoon sticky rice flour
TO MAKE:
- Soak the mung beans for 4 hours, or in the fridge overnight;
- Drain and rinse a few times, then transfer to a steaming drawer and steam for 50 minutes to 1 hour, until you can easily crush the mung beans to a paste with your fingers;
- Meanwhile, make the pumpkin filling, add the pumpkin puree and brown sugar to a nonstick pan, cook over medium heat, stir frequently, let it thicken;
- Mix the sticky rice four with a little water to create a thick slurry, add it to the pumpkin mixture in the pan, keep stirring and cooking until it becomes a thick paste, this process takes about 1 hour as well;
- Let the pumpkin filling cool down, divide into about 20 grams balls, place in the freezer for 1 hour;
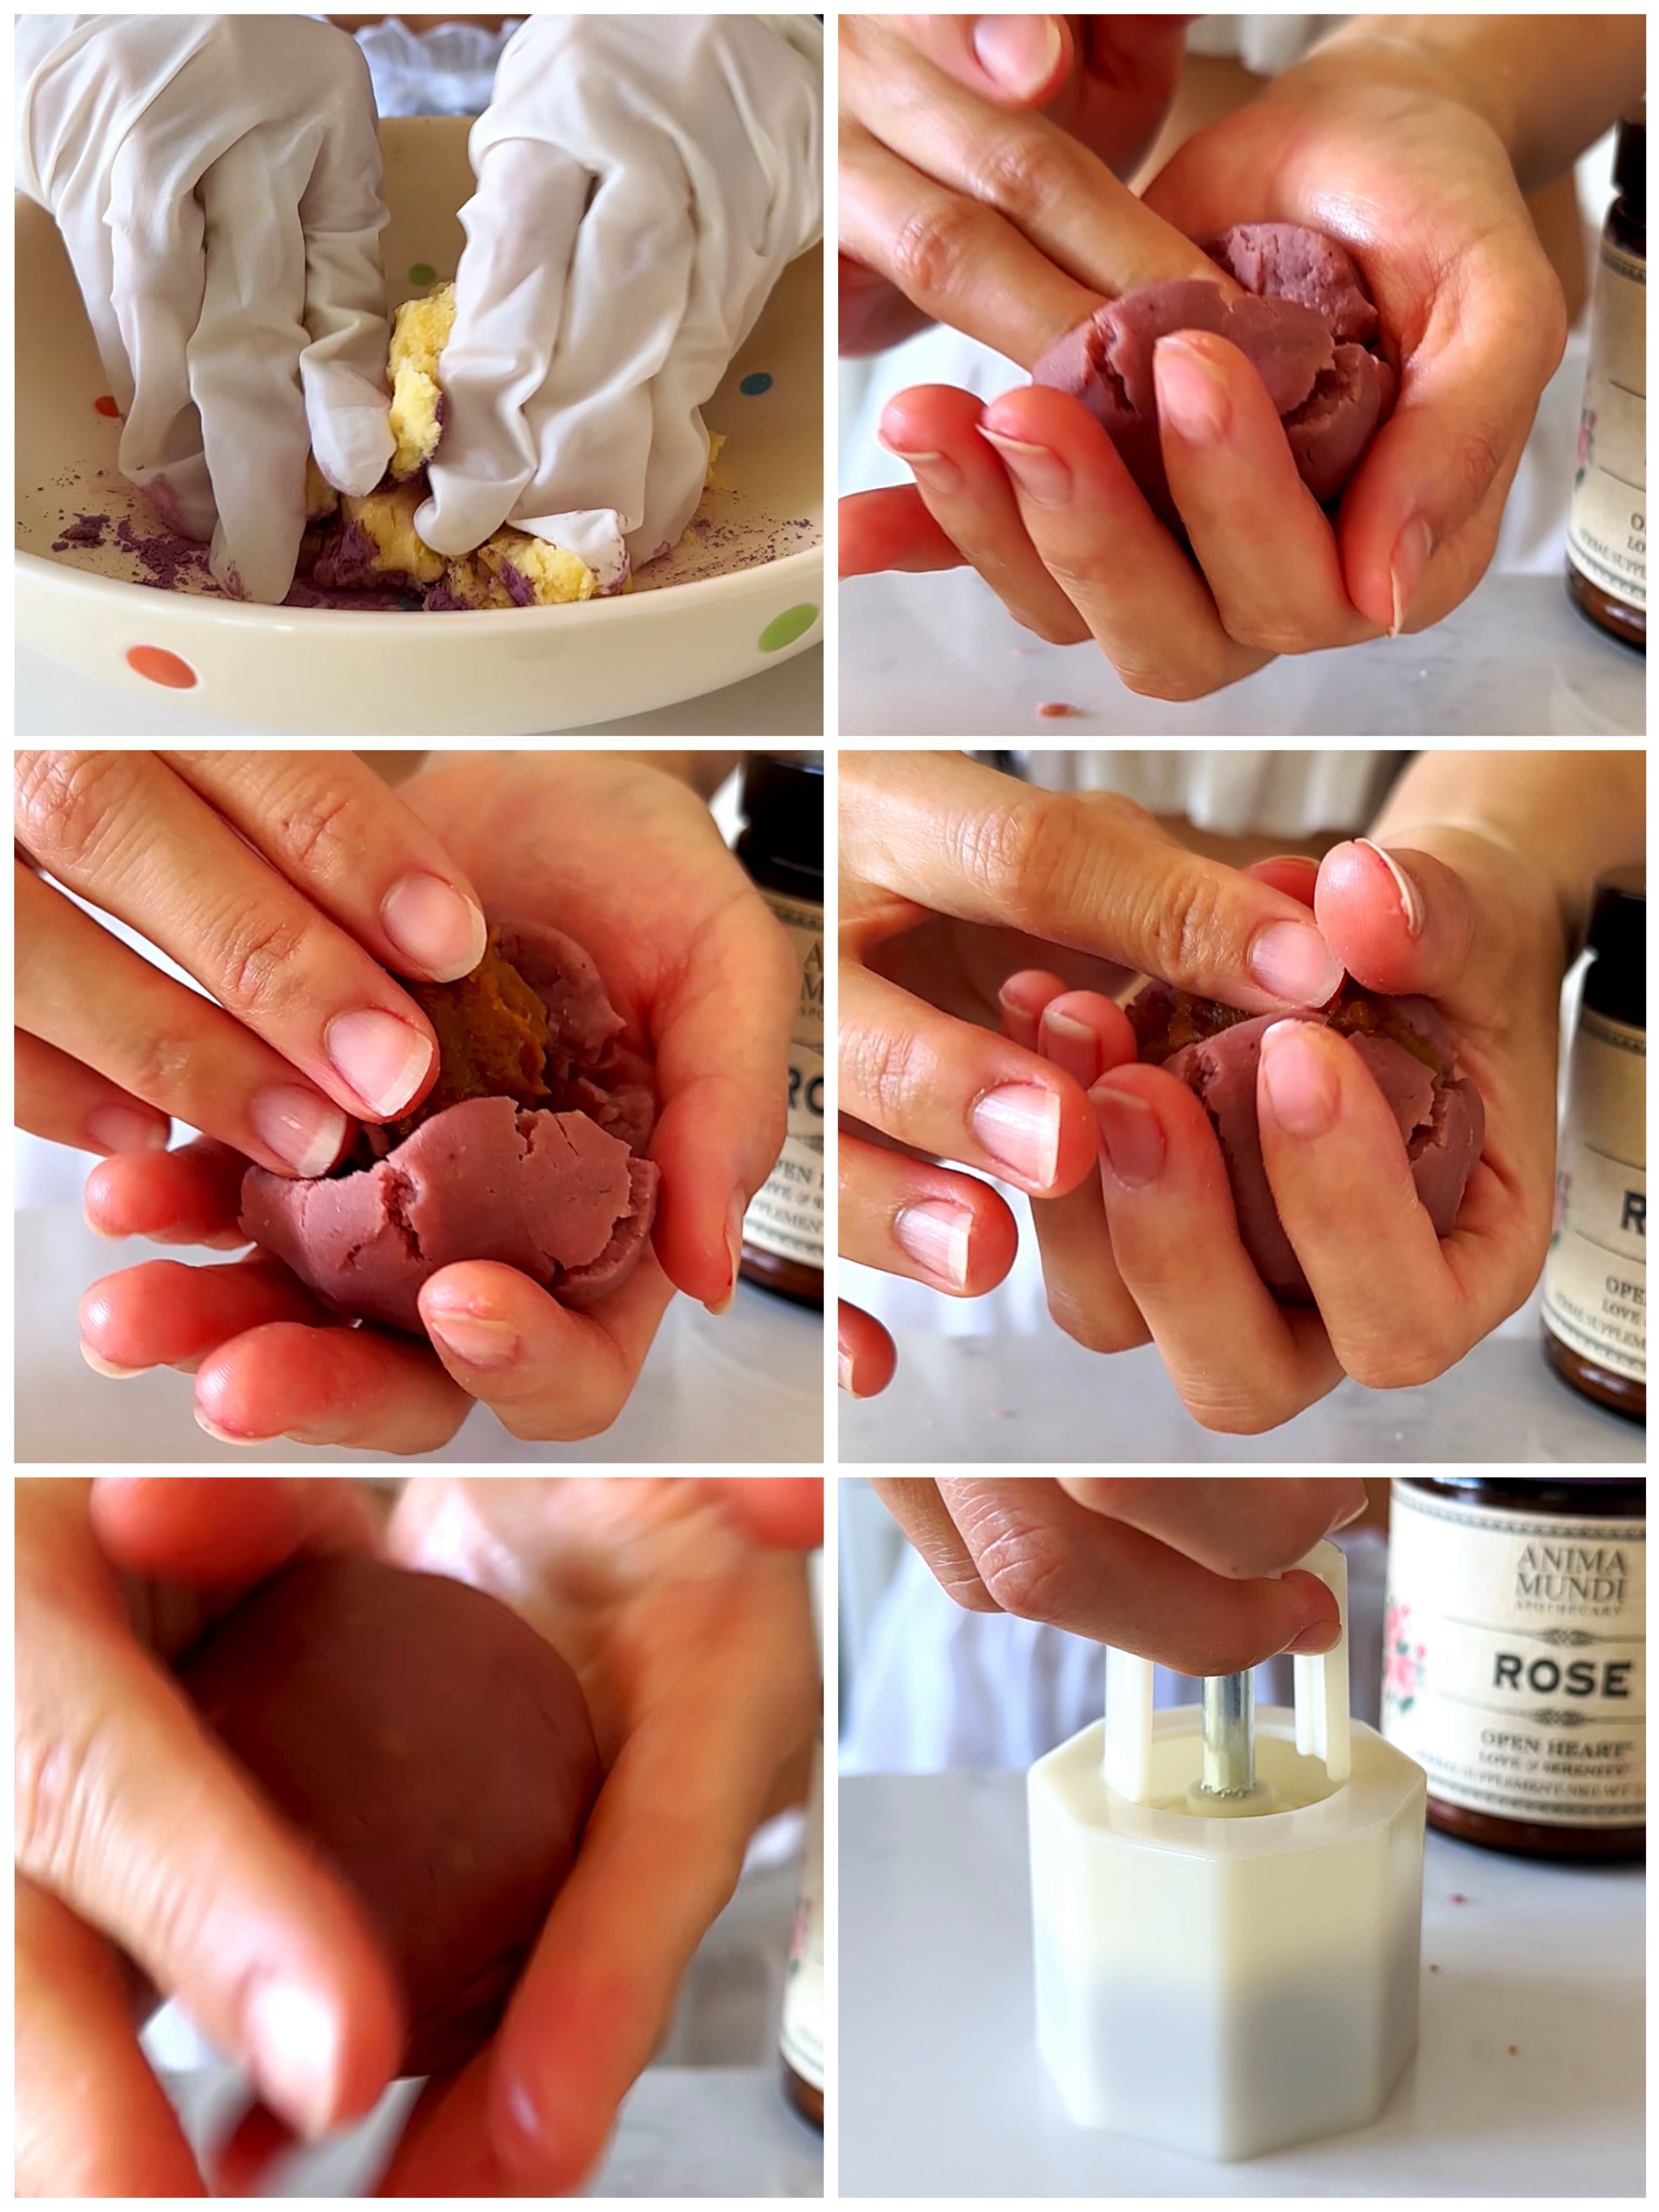
- When the mung beans are steamed, transfer to a large bowl, add the coconut oil and condensed coconut milk, or vegan butter and your choice of sweetener, and mash into a fine paste, knead colored powder into a portion or too if you like;
- Take 40 grams of mung bean mixture, roll into a ball then create a dent in the center, take the pumpkin filling out of the freezer, roll one of the pumpkin filling portion into a ball, place in the center;
- Pinch and close the mung bean cake, roll into a ball again, press with the mold;
- Repeat with the rest of the ingredients, you can also leave the mung bean cakes plain without filings;
- Serve chilled, enjoy!


