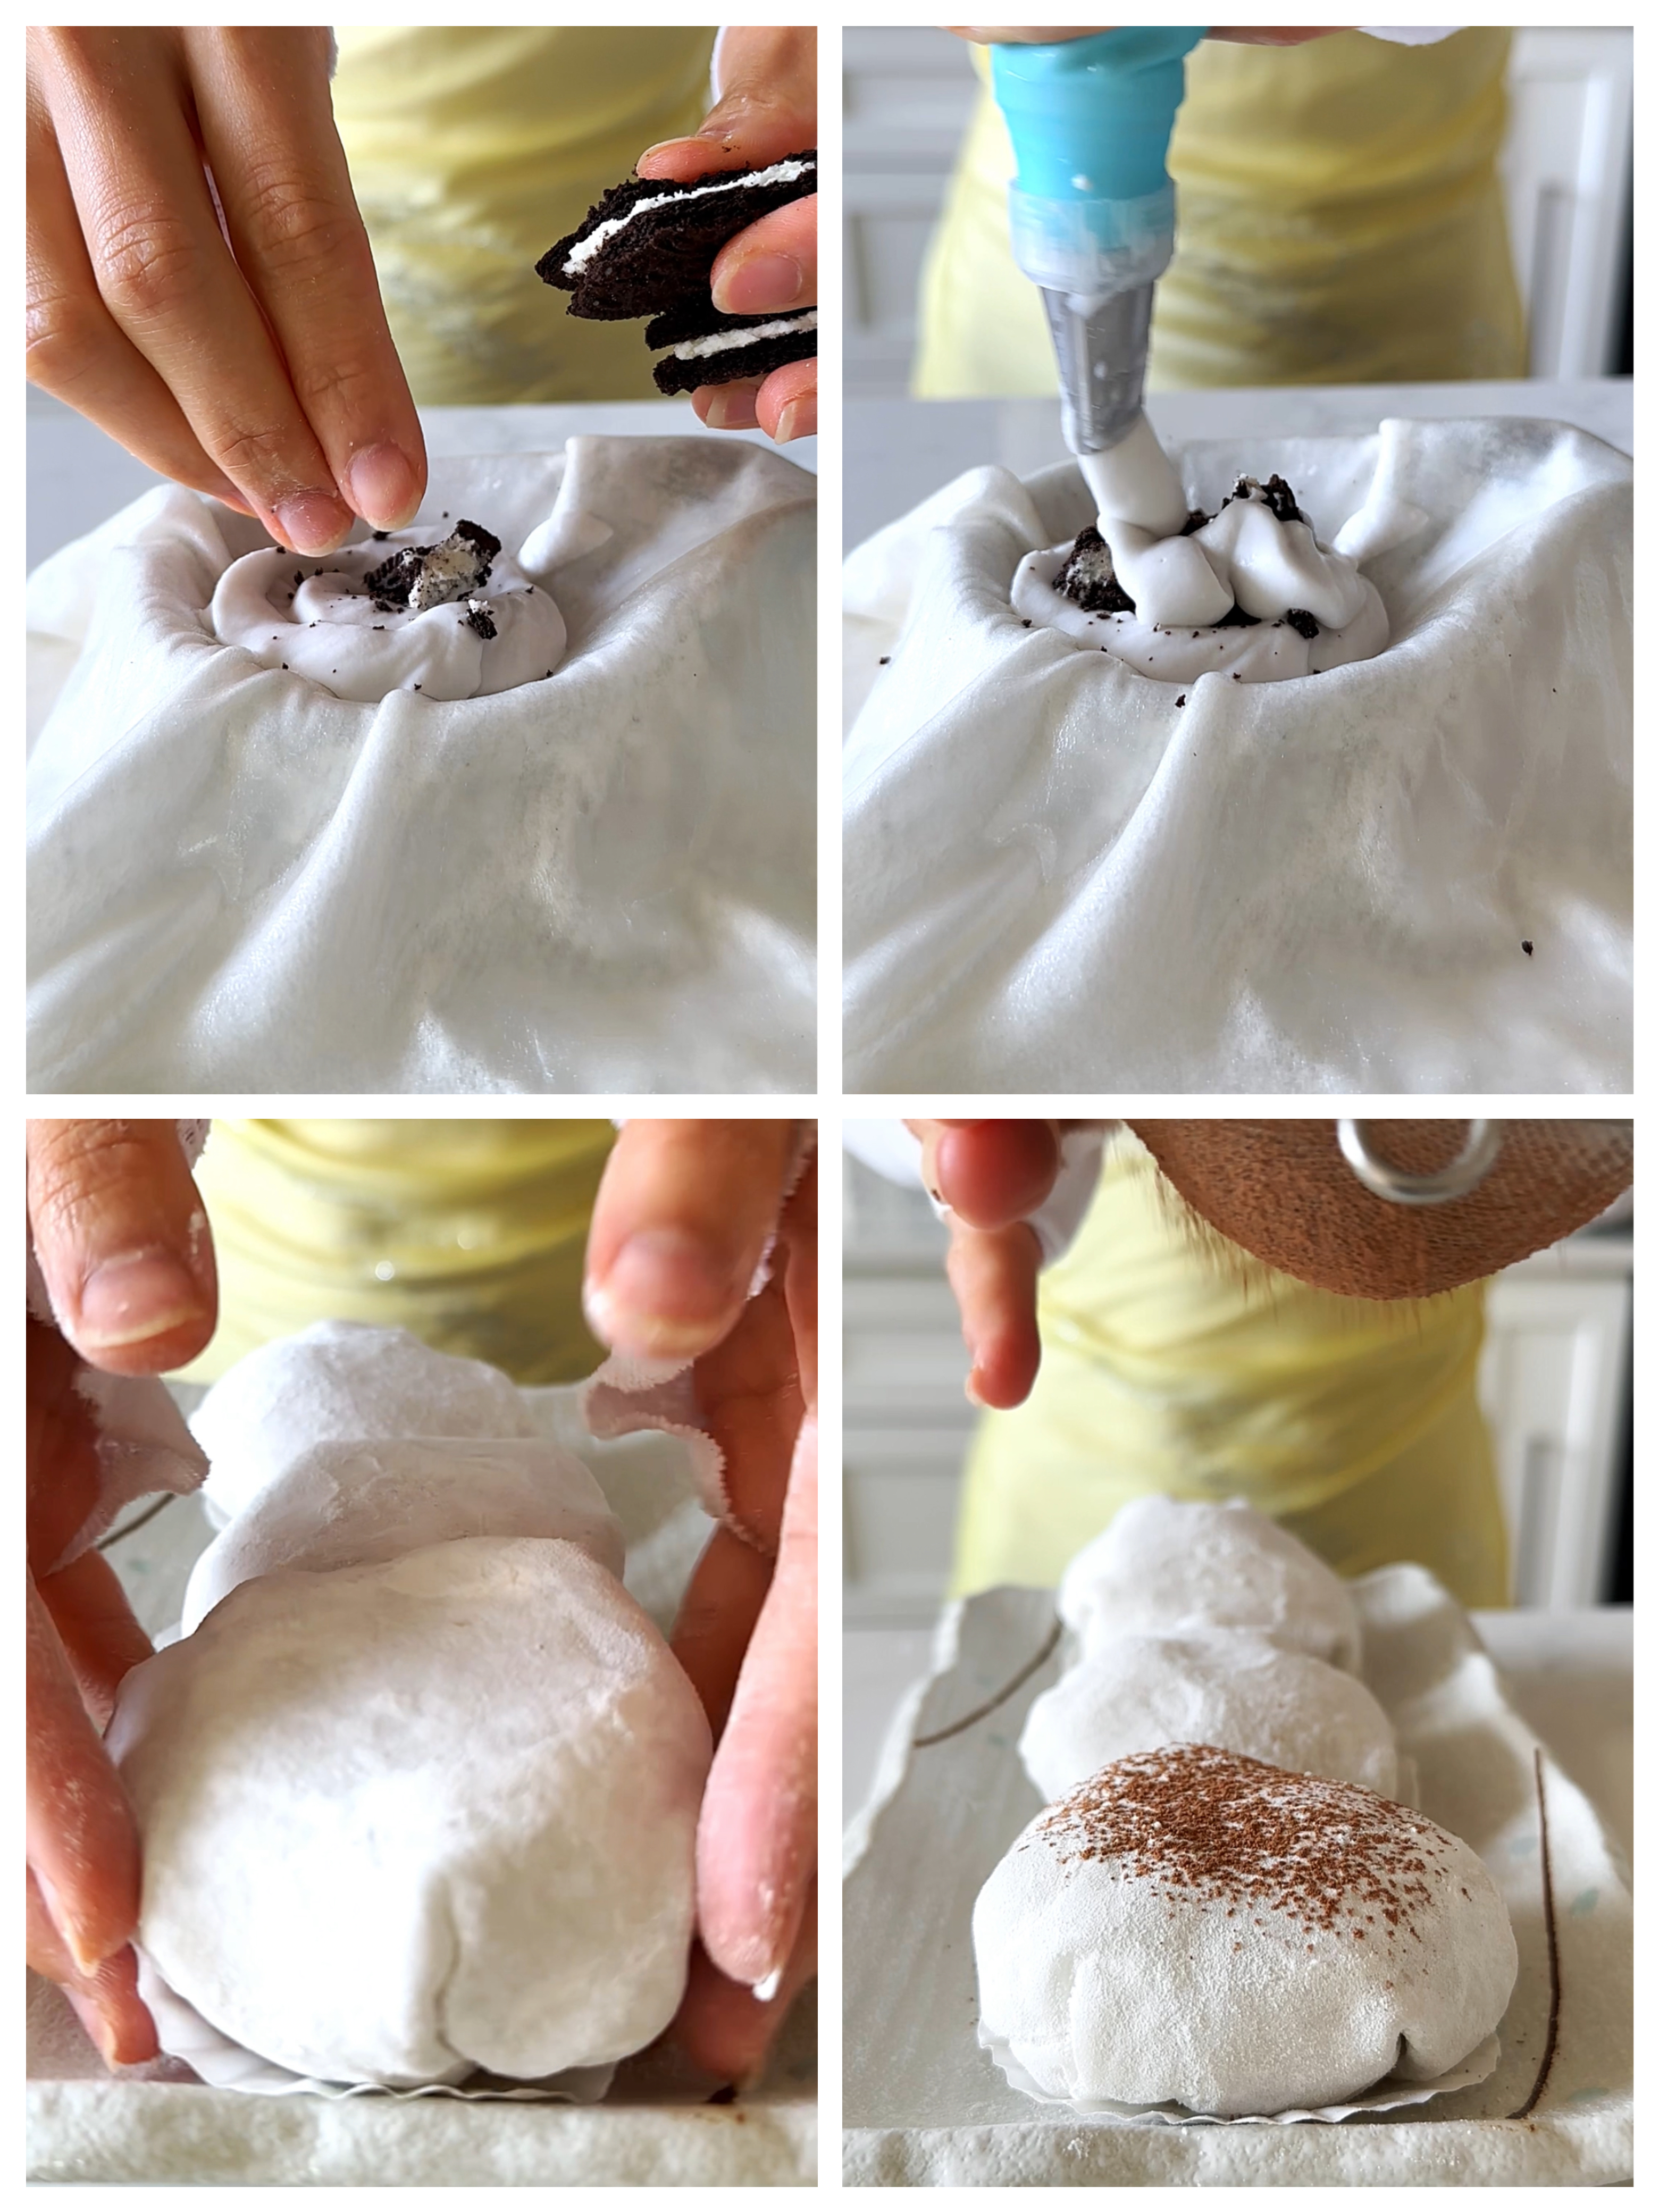
This rice paper mochi is the easier version ever but just as pretty and delicious as a classic cream-filled mochi treat. You can make them in just five minutes and instantly satisfy your craving for something chewy, pillowy, melt-in-your-mouth, and not overly sweet without the fuss of making the dough.
I LOVE mochi and have made them from scratch before, I made some bunny-shaped mochi mooncakes for the mid-autumn festival and they were so cute and yummy. However, that entire process was exhuasting. Mochi is a Japanese rice cake made of glutinous rice flour, water, and sugar and making them from scratch is a very labor heavy toll. You have to constantly stir the glutinous rice mixture while heating nonstop, and then knead and fold repeatedly for a long time for that shiny, smooth dough.
It is fun and rewarding to make them every once in a while but let's face it, I don't always have the time and energy for that while my craving for mochis is way more frequent. So I made up this rice paper version that's 1000 times easier and quicker! The rice paper substitutes the need to make the mochi skin from scratch and works almost perfectly - they will be thinner than a traditional mochi but have the same chewy, stretchy, and soft texture!
For fillings, you can go with whatever flavor you like, I did whipped coconut cream and persimmons, which are just like nature's jam when they're ripe, and filled the others with crushed Oreos. I've also made strawberries fillings and dusted with pink pitaya powder before.
INGREDIENTS:
*makes 4 palm size mochis
8 rice paper
1 15 oz can coconut cream
Fillings of choice, I used persimmon and Oreos
Toasted glutinous rice flour for dusting
Cacao powder for dusting, optional
TO MAKE:
- Refrigerate the coconut cream overnight, do NOT shake the can, let the cream part rise up to the top;
- Scoop out only the white, thick, solid part of the coconut cream, saving the clear coconut water at the bottom for another recipe or a smoothie;
- In a large bowl, whisk the coconut cream until fluffy and smooth, should only take a couple of minutes;
- Transfer the cream in a piping bag if you're using one and store the whipped cream in the fridge while you prepare the fillings and rice paper;
- In a small pan, toast the glutinous flour for a few minutes over low heat till you can smell the toasted rice aroma but not browned, make sure the pan is completely clean and dry, this is because we'll be using the flour for dusting and eating raw glutinous rice flour might cause stomach discomfort;
- Dip two pieces of rice paper in warm water quickly, lay them down on a flat surface, dust the side up with some toasted glutinous flour, brush the flour out evenly;
- Pick up the rice paper carefully and lay it over a small bowl with the sticky and undusted side up;
- Squeeze in the whipped cream mixture, add your filling of choice, and cover with more cream mixture;
- Pick up all four corners, twist and close into a ball, make sure there is no air bubbles inside, and cut off the excess rice paper;
- Repeat till you finish making all the mochis and let them chill and set in the fridge for 30 minutes, you can also refrigerate them overnight if you want the texture to be even firmer;
- Dust with cacao powder before serving, enjoy!


